
So Let’s Get Started With How You Can Make Stylish Friendship Bands At Home
Things Required
Cardboard
Compass
Scale
Pencil
Scissors
Steps;
- Take cardboard, make a circle of 5 cm radius. Now mark 8 lines from the pointers inclining the radius with the help of scale. It will look like a disc.
- Cut the circle and the lines.
- Now, use an Anchor thread to make the band.
- Cut threads to make the band.
- Cut 14 strings, each 16 cm in length.
- Use 4 green, 4 yellow, and 6 pink strings.
- Make a knot and tie all 14 strings.
- Make a point in the centre of this disc you made.
- Push the knot to the other side through the hole.
- Place two strings in the 1st cut.
- Then, again, place two yellow strings cut.
- Place two pink strings in the 3rd cut.
- Place two pink strings in the 4th cut.
- Place next 2 pink strings in the 4th cut.
- Make sure they all are tied in the frame.
- Now, place two green strings in the 6th cut.
- And place two green strings n the 7th cut.
- Now, as the 8th cut will be empty.
- Pick the 3rd string and place it on the space. Rotate left.
- Again, pick the 3rd string and put it on the space. Rotate left
- Again, counting from there, pick the 3rd string and put it on the space. Rotate left.
- Then, again pick the 3rd string and place it on the space. Rotate left.
- You have to follow this pattern until you see it on the other side so that your friendship band increases in length.
- Then you can see on the opposite side that your friendship band is in process.
- Keep following the same pattern until the band is in a particular length.
- Then tie the knot and cut and take it out from the disc.
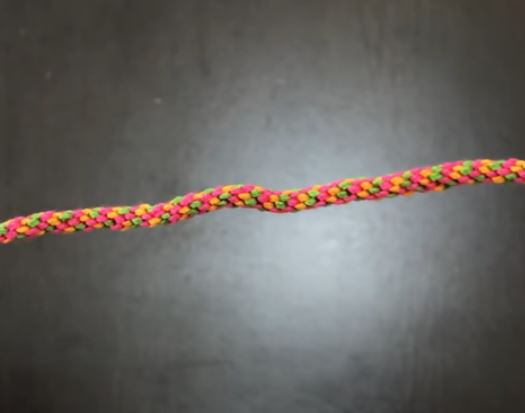
And, that a wrap. Your friendship band is ready.
How simple was that, right? Just follow these steps rightly, and then, you are right there. So with minimal materials, you can make this DIY friendship band is very simple and easy steps.